GAIA
Eve at Xavier University
île d’Orléans
I was enamored with the landscape of île d’Orléans, just north of Old Quebec City.
I was struck by the loneliness and solitude of the farmscapes. Often was most present was what was missing. This series captures the beauty of the landscape and solitude of the farmland.
All paintings are also available as limited edition signed and numbered giclee prints. See store for details
Artist CV
Artist CV
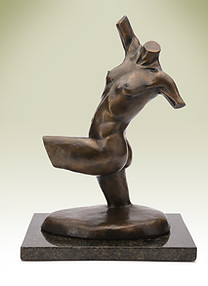
SCULPTURE
SCULPTURE
SCULPTURE
The art of lost wax casting
Recently someone asked me why I cast in bronze. It is a time intensive and costly process, so why go to to the bother? It's a good question.
My answer was that after being a graphic designer for so many years—where much of the work is ephemeral— it feels good to create something that will last a long time. Another, and more simple answer is that since I was a kid I've always like process of building and making, and the process of creating a sculpture and then going through the process of making a bronze come to life is deeply satisfying to me.
So what is a "lost wax" sculpture", and what is the process to make one?
The following is a step-by-step description of the process.
1. Create
The first step is to create the original. Most of my sculptures have been created in an oil-based clay that never dries, but original artwork can be made of anything. A sculpture such as can take almost one - two hundred hours to create, including conceptualization, maquettes (small models), building armature, applying the clay, and sculpting the final piece.
Once I've finished the sculpting of a piece, I crate it up and send it to the foundry for mold making and casting. I've had the pleasure of working with a number of here in Cincinnati and back in New England and am always impressed with the care and attention they give to my artwork.
2. Make a mold
A rubber mold is made from the original piece. Then a "mother mold" is built out of plaster to give the rubber the stability it needs for casting. This mold can then be used multiple times to cast additional “editions” of the original.
3. Wax Cast
The wax cast is made from this mold. It is about a 3/8” hollow shell cast of the original artwork. Once this is ready the artist is called in to review the wax and make any final edits or clean-ups. It is your final proof and once it is approved, it is ready to move into production
4. Ceramic Shell
The wax is then “dipped” in multiple coats of a ceramic slurry. It takes somewhere between 9-12 “dips” to get the necessary thickness,
and each coat needs to be completely dry before the next dip. Once the
appropriate thickness is achieved it is ready for burnout.
5. burnout
The ceramic coated wax is then heated in a kiln until the ceramic dries
and hardens, and the wax melts and runs out through the ducts created
by the wax tubes— thus the term “Lost Wax Process”. What is left is
a hollow ceramic shell that the metal is poured into.
6. Metal Pouring
The molten bronze (heated to about 1800° Fahrenheit) is poured through the ducts, filling the space left by the wax. When cool, the outer ceramic shell and core are removed, and the bronze may receive finishing touches.
7. Finishing
Depending on the sculptures, several pieces of bronze may need to be
welded back together. Weld lines need to be cleaned (chased) so they don’t appear on the final piece. The finished piece is sandblasted and readied for patination.
8. patination
The patina is the icing on the cake of this age-old process. The metal is
heated and then sprayed with a coating of chemical compounds such as oxides, carbonates, sulfides, or sulfates to achieve its final colorization—
or patina. Once the desired color is achieved, the piece is then waxed
and polished.
Each edition is numbered, and each is a unique work of art!
- Paul

Work on original artwork

Wax cast

Metal casting

Patination